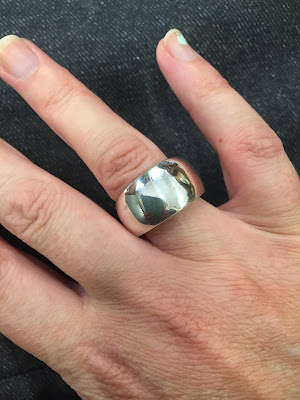
Showing posts with label ring. Show all posts

Thursday, 23 July 2015

Siena, my Florentine Ring and recipes for gold


Last weekend as part of our cultural excursions we caught the bus to Siena, which was a short 1.5 hour bus ride away.

Siena's historical centre has been Unesco Heritage listed as a 'living embodiment of a medieval city'.

Easily explored in a day we wandered around admiring the architecture. One of the highlights was a look through Siena's duomo which was built from 1215 and finished about two centuries later. The interior is absolutely stunning from the inlaid marble floor, black and white stripe marble pillars, through to the vividly coloured frescoes painted by Bernardino Pinturicchio in the Liberia Piccolomini, which also housed a great collection of medieval manuscripts. The Siena Duomo, also known as Opera della Metropolitana di Siena, is easily one of the most beautiful churches I have ever visited.

Amazing detail in the marble floor

Black and white marble pillars 

Vividly coloured frescoes in the Libreria
Amazing details in the ceiling
 We spent most of the afternoon exploring the church and its associated buildings and by the early afternoon we were ready for a relaxing drink of the local red wine, Chianti, whilst overlooking the Piazza del Campo.


 It is hard to believe that this is my final week at the Academy Riaci. On Monday I started my final ring, which combined all the techniques I have learnt over the past couple of weeks.

I love the way the ring was shaped using a bowl of lead, and a steel ball. This creates a slight curve on the surface whilst also helping to create the circular ring shape. It is a technique I have not encountered before.

Shaping my final ring
The next step was to solder the many pieces together.

I also learnt how to make 24k gold into 18k gold by melting it with silver and coper. I also learnt the ratios for mixing rose gold too. My teacher is quite the alchemist.

The recipe to make 18k gold is:
75% pure gold
20% silver
5% coper

The recipe to make rose gold is:
75% pure gold
15% silver
10% copper

pretty neat huh!

soldering the gold bezel to the ring
After a lot of filing and clean up, I then practiced some incisione on the sides of the ring band, using sealing wax to hold it in place. 


I chose to set an amethyst stone because purple is the colour of Florence. 


And here is the finished ring, a nice object that embodies my memories and experiences of my four weeks in Florence.

The final ring
I also finished the earnings I started in the first week too. 

Incisione earrings 

Thursday, 16 July 2015

Leaning towers

As part of the academic program at Accademie Riaci, cultural excursions take place every second week. Florence is central to many renown towns and villages, and this week we travelled to Pisa to see the Leaning Tower.

Leaning tower of Pisa
 It costs 18 Euros to climb the tower and combined with heat of about 35 degrees celsius - so we elected to view the tower whilst in its shadow instead.

The serious tilt of the Leaning tower.

There is more to the complex than just the tower which is really just a bell tower for the cathedral and baptistery and the complex is known as Campo dei Miracle (field of Miracles). 


Within the cathedral features a pulpit carved by Giovanni Pisano, sculpted between 1302 and 1310, which features nudes and heroic figures. It was at this time that the human body was beginning to be celebrated, rather than being thought of a place of sin. It is said that this inspired Michelangelo's David.


Academia Riaci also organises art tours on Friday mornings and we visited the Galleria dell'Academia which has a room dedicated to Michelangelo's sculptures along with a large exhibition of medieval paintings. Seeing Michelangelo's David in real life brought tears to my eyes. It is an exquisitely carved sculpture and the story behind it was brought to life by an amazing art guide, Andi who runs art tours Artist for a Day

Back at school this week I learnt the basics of incisione, carving into metal. Using sealing wax to hold the metal in place, I used small sharp chisels to create an image in the metal. Some of the techniques are very similar to those used in print making. 

Interestingly, each of the different jewellery techniques (construction, incisione, gem setting) are taught by a professor who specialise in each area. Daniele, my teacher, specialises in construction. 

Tools used for Incisione
 So my incisione work is very much experimental!

My attempts at incisione
 I also contracted a fourth ring, which was quite complex and included a number of different techniques to create the final piece.

The fourth ring

Another view of the fourth ring

 Time is passing incredibly quickly in Florence and its hard to believe I have only one more week here of study.


Thursday, 9 July 2015

Bellisimo! Ponte Vechio + Cinque Terra

La luna and the Ponte Vecchio

During the first week I was in Florence I was graced with a full moon which glowed like a delightful peach in the summery sky. To enjoy the balmy evenings we packed a picnic and ate dinner on the bridge. Ponte Vecchio means 'old bridge', built in 1335 each side of the street are shops selling jewellery, art and souvenirs. 

As promised, here are some pictures of the finished objects I was working on last week.

Brass ring

Silver leaf pendant : front

Silver leaf pendant : reverse

Whilst in Italy I couldn't resist a trip to the Cinque Terra, (five villages) that are connected by walking paths. Because the terrain is so steep some of the villages are still not connected by road, with rail and boat as the only mode of transport. If you are really energetic you could walk all five in one day, but with the current hot summer days, I wouldn't recommend it! We ended up walking one of the three trails that were open and by the end of it a swim was very necessary.

The scenery between Levanto and Montarosso on the hike
Picnic on the rocks in Riomagiore

Back at school for week 2 I couldn't help but admire the beauty of the jewellers block which bears witness to the many hands that learn jewellery at the Accademia Riaci.


I commenced a pair of traditional Florentine design earrings which have been cut out in silver. 


I also made a Florentine Seal ring, which is quite complicated and technically challenging (for me anyway!) 


The class is incredibly small, with only two students, which makes it more like private lessons. I feel incredibly lucky to have such an amazing opportunity to learn traditional technical skills as most of what we do is by hand (no additional tools or machinery with the exception of the polishing wheels). We have an interpreter to explain what our teacher says, although I can understand most of what he is saying by watching his demonstrations. I wonder what I will make next?

Ciao! x


Thursday, 5 March 2015

Pioneer Landscape Ring

Our second major assignment for Advanced Techniques in jewellery was to create a sculptural ring that incorporated tube settings.

Continuing to explore my interest in pioneering Australia I chose to design a ring that referenced the landscape. I was also looking to incorporate other materials and so I wanted to work with plexiglass and also parts of an antique saw blade I had acquired.

Pioneer Landscape Sculptural Ring detail
Working with my fascination of light and transparency I used the plexiglass to create mountain landscapes, with sections of the saw blade to refer to the manual labour required to eek out an existence in the Australian bush. The silver casing was textured to also refer to the terrain.

I carved rough hewn nails in wax that were then cast in silver. These became the place to slide your fingers through and are in essence the 'ring' part of the sculpture.


Originally I was planning to set gems in the rivet holes that hold the plexiglass and saw blades within the sterling silver casing, however as the design progressed this was not possible. So I added the chain which connects to a cast silver nail at one end, and the end of the saw blade at the other. The chain can be wrapped around the wrist with the saw and nail dangling like charms from a charm bracelet. 

It was onto this piece of steel that I fused 24k gold spots, soldered the silver tubes and set Andalusite gems within them. Andalusite is a beautiful stone that looks green in some lights, and a light pink in others.  

It was incredibly exciting to be working with found objects, rusty steel and gold and it has led to many ideas that I wish to explore! 


Thursday, 12 February 2015

Tube Setting Gems

This week I have been practicing tube setting in jewellery. Tube setting is very similar to what the name implies, that is setting a gem in metal tubing.

In some ways it is very similar to a bezel setting, in the sense that a wall of metal encases the gem.
But with a bezel setting you start out with a flat piece of sheet and bend it around the gem, opposed to starting with a tube.


Never happy just to make a sample for the sake of a sample I decided to make a ring using a design I have been wanting to make for quite some time. 


I had 2 very pretty garnets that were the exact size for the sample that we had to make. 4mm in diameter. This is how it turned out. One of the exciting things about this design is that it also stands up - creating a 'traffic light' sort of look. 

A friend also said that it looked a little like the emoticon of the face with the tongue sticking out. Like this :p 


Note the bandaid on my finger - an injury sustained from jewellery making of course! A friend of mine who is the most amazing jeweller has a little tattoo on her finger from a similar cut where silver got trapped. I think it is the coolest accidental tattoo ever!

Thursday, 9 October 2014

Enamelling: Collaborative Assignment Stage 2

This week we drew numbers which corresponded with everyone's enamelled pieces. I got number 5, which happened to be JiHoo Lee's ring. Hoo is from South Korea and on exchange here in Canada for 6 months.

Hoo's ring
I love the design, its a very simple, yet clever and effective ring. It is made from one piece of copper which has been manipulated and threaded through itself to create the form.

One of the reasons why I think it is so clever is because the solder used to form shapes in jewellery often will melt in the enamelling kiln, so designs with enamelware need to take this into consideration.

Hoo modelling her ring, top view

Hoo modelling her ring, side view
Our assignment for this week as to manipulate up to 40% of the surface area.... I wanted to add to it, without compromising the design.

So I decided to use a stencil technique.

Stencil resist using a pressed flower

I have been collecting and pressing flowers recently. I am particularly drawn to the flower that grows wild called Queen Anne's Lace

Using a pressed Queen Anne's Lace flower, cobalt blue enamel and a 200 mesh sifter I gently sifted the enamel onto the ring.

And this is the result.

Hoo's ring with Queen Anne's Lace flower stencil - in progress.
Image by Thomas Miko

Hoo's ring with Queen Anne's Lace stencil
Image by Thomas Miko

Ill see if I can find an image of the changes to my piece that Hoo made (strangely enough we got each others piece!)


Thursday, 10 July 2014

The Fence Ring

I am amazed at just how much of an impact my residency at Hill End last year has had on my work.

Whilst I was there, not only did I sketch the interiors of the cottage I was living in, I also collected a lot of photographs of the fences and textures I came across on my daily exploration of the area. Some of these images were explored through etchings which were exhibited in Landscapes, Ladies and Literature at the Barometer Gallery in Sydney last year.

This year I have been learning jewellery making techniques and I used the inspiration gathered in Hill End as the concept for my jewellery designs.


Working off some quick sketches in my sketch book I made a marquette of the ring design using paper and string.

Fence ring marquette using paper and string
The ring is designed to be worn on two fingers, the ring and middle finger. It was important that this integrated with the design of the fence.

Fence ring made from copper
The first fence ring was made using copper. This was to make sure I could practice soldering the joins and make any tweaks to the design before committing to sterling silver.

Fence ring. Sterling silver. 11cm long  x 6cm high x 0.6cm deep


Thursday, 8 May 2014

Completed Basket Rings displayed within Ceramics

Basket Rings. Photography: Christina Arsenault
A couple of months ago I shared with you the beginnings of a new series of work: baskets that are woven in metal and attached to rings, and more information on the concept behind these pieces can be found here

Pioneer Landscapes. Photography: Christina Arsenault

Initially they were designed to be displayed within the context of larger blocks of clay. (Further information on this concept can be found here). 

Salt of the Earth 1. Photography: Christina Arsenault

Salt of the Earth 2. Photography: Christina Arsenault
Although I also like them displayed without the ceramic pieces and just in the engraved pebbles that support them, as seen in the top image.


LinkWithin

Related Posts with Thumbnails