Thursday 26 February 2015

Keraflex experiments

I have been wanting to experiment with Keraflex ever since I heard about it when I first studying ceramics a couple of years ago. It is super thin ceramic that comes in flat sheets (0.5mm or 1mm thick) very much like paper. It is held together with a binding agent which makes it flexible when soaked in water and it provides the opportunity to make ceramic  products which are extremely thin and light.

Recently I have been playing with it. Experimenting with stitching to hold it together to create different sorts of forms.


Stitched keraflex (white bottom left corner)
Above are some samples to see what happens when the form is held together using thread before being fired in the kiln. In this image there are also stitched cardboard and copper samples where I am experimenting with form.


Most of the stitched pieces broke during the firing. But the shards were equally beautiful and intresting shapes, so I attached them to one of my gate like structures. I anticipate that this could be a brooch. 

Despite being really thin, the material is quite strong when fired to cone 10. 

Paper marquette of necklace idea

I also experimented with making cone shapes. With the intention of making a necklace similar to the paper version above.

Keraflex cones before firing
Keraflex cones after firing with gold lustre
I like the white porcelain combined with the gold lustre. But to get gold lustre to work, they need to be glazed with clear first (fired to cone 6). In the pieces above, I glaze only the bits that are now gold, so there is also the contrast between matt porcelain and shinny gold.

I have moved on from the original cone idea, and I am enjoying working with the shards. So I am thinking that these will be broken and reassembled along the same lines as the brooch idea.


Thursday 19 February 2015

Noel Guyomarch Workshop

Our Advanced Technique jewellery class had the fabulous opportunity to participate in a workshop with Noel Guyomarch. Noel has one of the most interesting contemporary jewellery galleries in Montreal, Galerie Noel Guyomarch, and he is an avid collector and supporter of contemporary jewellery.

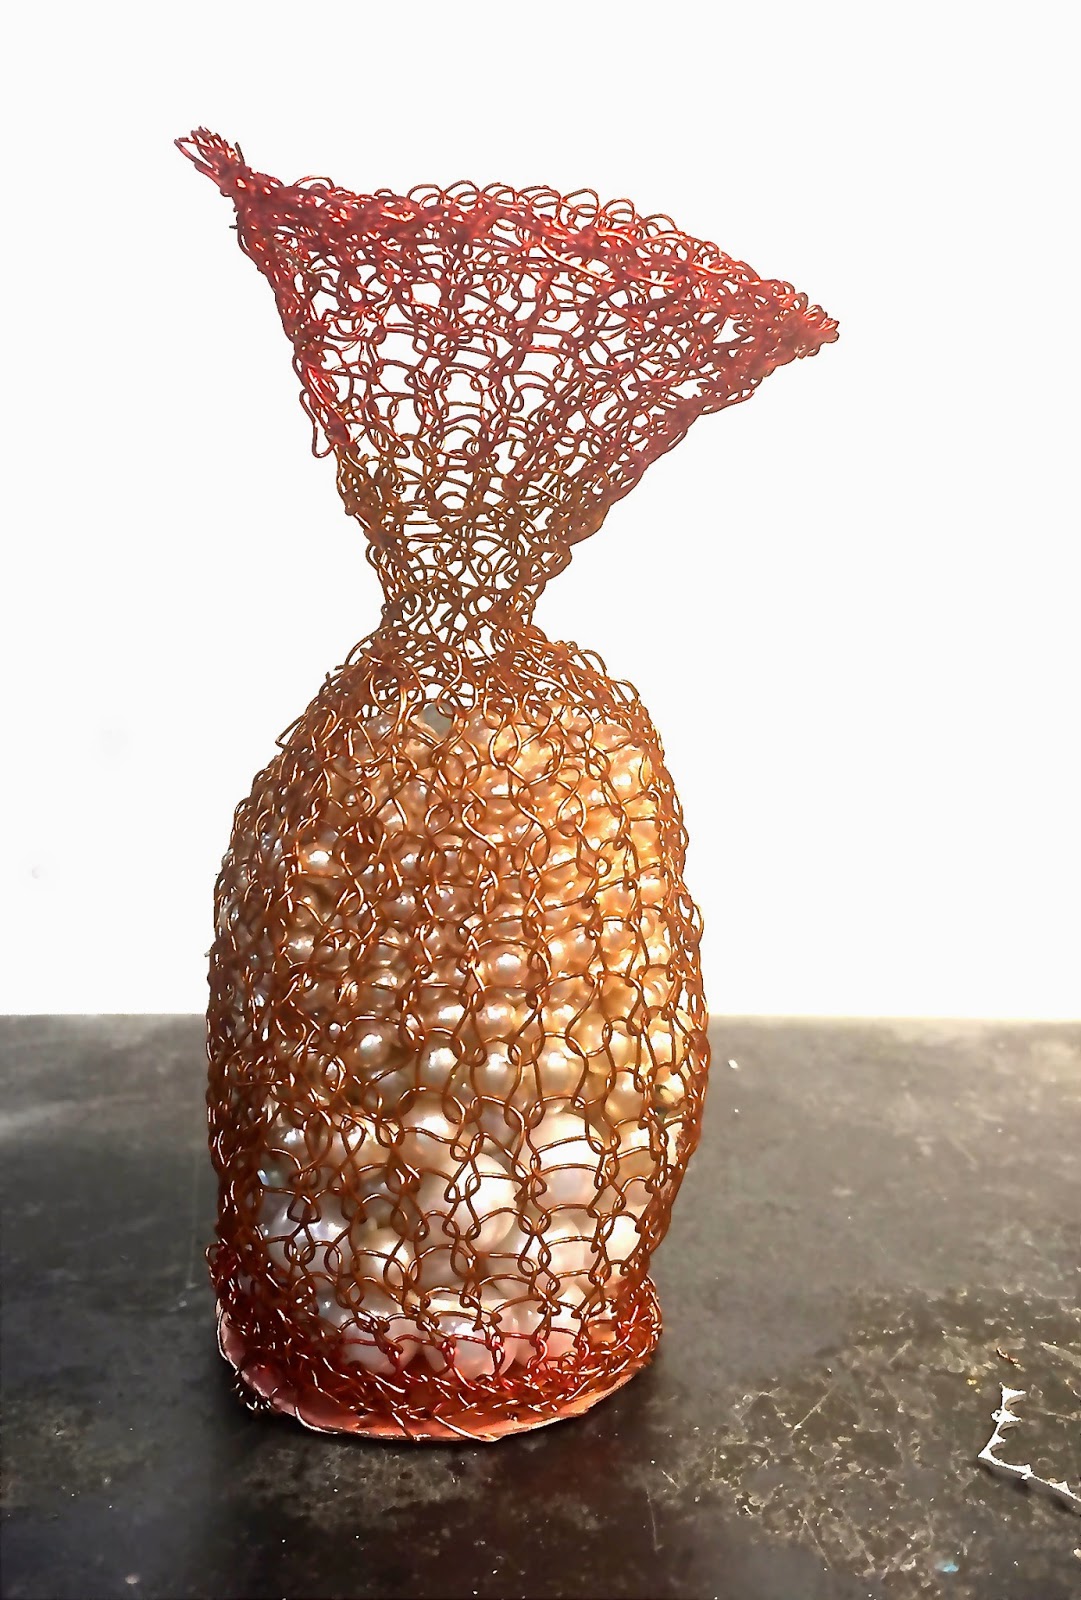
Memory vessel: Pearls of Wisdom. Knitted copper wire
15cm high x 6cm deep

We were asked to bring something special that we treasured. I haven't really brought many souvenirs from Australia with me, with the exception of a beautiful blue bolder opal ring that I wear religiously.

Example of boulder opal

Noel asked each of us why the item was important and then we had to translate these ideas into another object.

For me, the ring is important for many reasons. The opal is from Australia, so wherever I travel I always have a bit of Australia with me.  It is my birthstone. It is also made from water, something Australia doesn't have much of. What makes it most special though was that it was a present from my Nan.

With these thoughts in mind I started making a vessel to contain memories. I just happened to have a collection of faux pearls on my desk and they made their way into the container too. Inevitably it became known as Pearls of Wisdom.

My work bench is known throughout the jewellery department for its collection of interesting bits and pieces, and I have a collection of marbles which I would like to make another container for. This vessel will be all about 'losing your marbles'!

Thursday 12 February 2015

Tube Setting Gems

This week I have been practicing tube setting in jewellery. Tube setting is very similar to what the name implies, that is setting a gem in metal tubing.

In some ways it is very similar to a bezel setting, in the sense that a wall of metal encases the gem.
But with a bezel setting you start out with a flat piece of sheet and bend it around the gem, opposed to starting with a tube.


Never happy just to make a sample for the sake of a sample I decided to make a ring using a design I have been wanting to make for quite some time. 


I had 2 very pretty garnets that were the exact size for the sample that we had to make. 4mm in diameter. This is how it turned out. One of the exciting things about this design is that it also stands up - creating a 'traffic light' sort of look. 

A friend also said that it looked a little like the emoticon of the face with the tongue sticking out. Like this :p 


Note the bandaid on my finger - an injury sustained from jewellery making of course! A friend of mine who is the most amazing jeweller has a little tattoo on her finger from a similar cut where silver got trapped. I think it is the coolest accidental tattoo ever!

Thursday 5 February 2015

Runcible Spoon

Our first big project for Advanced Techniques Jewellery class was to make a Runcible Spoon.

Runcible was a term first coined by Edward Lear in 1871 in the poem The Owl and the Pussycat in the third verse.

They dined on mince, and slices of quince, 
Which they ate with a runcible spoon;   
And hand in hand, on the edge of the sand, 
They danced by the light of the moon, 
The moon, 
The moon, 
They danced by the light of the moon.

It is a nonsensical term and we were asked to design a spoon for a nonsensical purpose, which included a bezel setting.

With my interest in pioneers and landscapes I decided it could be fun to make a mini shovel which could for digging yourself out of trouble, or perhaps digging yourself deeper into trouble. Playing on the colloquial saying 'keep digging'.


Of course, not content with using hard stones which are easier to set (because they don't break) and only silver, I decided to incorporate opals I had bought in Australia at Christmas. I wanted to use opals because they are uniquely Australian, they are my birthstone, and they are made up mainly on solidified water. They are also considered a soft stone, and will chip easily.


I also wanted to make the bezel setting out of gold, because the warm colour of the metal enhances the colours in the opal.

Combining silver and gold was a new experience for me. And it took quite a few goes to get it right. At first I was using 22k gold solder to try and attach the bezel, but all I managed to do was melt the silver plate. After talking to a couple of established jewellers, they all suggested that I use silver solder instead. I did, and had a much better result. Yay! 


The shovel idea originally was going to be attached to a stick, but as the idea evolved it turned into a brooch-like pocket watch. There the handle can be attached to your sweater, and the chain is long enough for the shovel to be placed in the pocket. 

I ended up making 3 handles to get the perfect result (I didn't like the pin connection on the first one, and in the second one the stone chipped) but during the process I have ended up with a series of brooch-like pocket jewellery.

The first is the shovel, the second is a pocket thimble/bucket and the third handle is going to be attached to a handkerchief (which is still in the process of being made).

Image by Deng Chen


LinkWithin

Related Posts with Thumbnails